Together Mode: Difference between revisions
(Added additional info to some of the stages. Will work on it more tomorrow.) |
(→Stages: Haven't found replacements for the others yet.) |
||
| (40 intermediate revisions by 10 users not shown) | |||
| Line 1: | Line 1: | ||
[[File:Together mode.png|thumb|280px|The Together Mode logo for Worldwide play]] | {{Missing Image|Images for Stages}} | ||
[[File:Together mode.png|thumb|280px|The Together Mode logo for Worldwide play.]] | |||
[[File:TeamBattle.png|thumb|A match begins]] | |||
The '''Together Mode''' in ''[[Kid Icarus: Uprising]]'' is a new feature to the series that allows six players to battle each other. The entire mode plays in the same way as the ground missions of the game, with the on-rails flight mechanics never being used during any part of a match. It was first introduced at E3 2011 and allows 3 on 3 battles using the same weapons that are featured in the single player campaign. Players play as [[Fighter]]s equipped with a weapon and [[Powers]] chosen before the matches begin, and a Fighter can be replaced with either [[Pit]] or [[Dark Pit]] once certain requirements are met. Despite this being a multiplayer mode, all four modes can still be played by one player simply by creating a room or choosing the "With Anyone" mode. In "With Friends" or "Nearby" mode, the empty spots will be replaced by computer players. The number of Fighters defeated are represented by swords on the top right corner of the main Together Mode screen. | |||
The | The game supports local and online multiplayer, allowing six people nearby or across the globe to battle each other in both random and friend matches. ''Uprising'' uses the [[nwiki:Nintendo Network|Nintendo Network]] instead of [[nwiki:Nintendo Wi-Fi Connection|Nintendo Wi-Fi Connection]], the first official game in North America to do so. | ||
==Connectivity== | |||
===Nearby (Local)=== | |||
When selecting "Nearby", players can only play with other people in close vicinity by creating rooms for them to join. | |||
===Far Away (Online)=== | |||
When selecting "Far Away", players can battle it out with friends or strangers all across the world. When playing with strangers, players will be sent to a random room with available slots. | |||
====With Friends==== | |||
This option only allows fights between friends registered on the Friend List while playing "Far Away". | |||
====With Anyone==== | |||
This option only allows random strangers to join the fray while playing "Far Away". | |||
==Game Modes== | ==Game Modes== | ||
There are two modes in Together | There are two main modes of gameplay in Together Mode: | ||
===Light vs. Dark=== | ===Light vs. Dark=== | ||
[[File:Multi_art1.png|280px|right]] | [[File:Multi_art1.png|280px|right]] | ||
The rules of this mode are both unique and simple. All six players are divided into two teams: [[Light Team]] and [[Dark Team]]. Each team consists of three Fighters with separate health bars and each armed with a weapon of choice as well as their own [[Powers]]. In addition to the individual health bars, each team also has a life gauge that is depleted each time a team member is eliminated. The main goal of the game is to keep defeating the opposing team's Fighters until their life gauge is depleted. Once that occurs, the enemy team's last defeated member will spawn as either Pit or Dark Pit, depending on the team's color. At this point, the life gauge for that team will be used as the angel's health bar, and once again must be depleted for the other team to win. However, angels are much stronger in battle and have more health than the typical Fighter, making teamwork very necessary to beat the enemy. If a player other than the angel is defeated, the angel's health bar is depleted as a life gauge, however healing powers and items can restore the gauge as a life meter. | |||
The rules of this mode are both unique and simple. All six players are divided into two teams: [[Light Team]] and [[Dark Team]]. Each team consists of three Fighters with separate health bars and each armed with a weapon of choice as well as their own [[Powers]]. In addition to the individual health bars, each team also has a life gauge that is depleted each time a team member is eliminated. The main goal of the game is to keep defeating the opposing team's Fighters until their life gauge is depleted. Once that occurs, the enemy team's last defeated member will spawn as either Pit or Dark Pit, depending on the team's color. At this point, the life gauge for that team will be used as the angel's health bar, and once again must be depleted for the other team to win. However, angels are much stronger in battle and have more health than the typical Fighter, making teamwork very necessary to beat the enemy. If a player other than the angel is defeated, the angel's health bar is depleted as a life gauge, however | |||
===Free-for-All=== | ===Free-for-All=== | ||
[[File:Multi_art2.png|280px|right]] | [[File:Multi_art2.png|280px|right]] | ||
This mode has no teams and no angels, instead having different colored Fighters battle each other until the time limit is over. Who ever receives | This mode has no teams and no angels, instead having different colored Fighters battle each other until the time limit is over. Who ever receives the highest overall score wins. Like team matches, players will be able to equip their weapon of choice as well as a number of Powers for use throughout the match. Some of the battlefields in Free-for-All are also considerably smaller than those of Light vs. Dark. This mode can be played with less than six people, although computerized characters will fill in the rest of the slots. | ||
{{clr}} | |||
==Rules== | ==Rules== | ||
===Weapons and Items=== | ===Weapons and Items=== | ||
At the beginning of each match, all of the players will be able to choose amongst the weapons they have collected during the single player campaign. In addition, some well known items can also be found such as [[Food]] to replenish health. Finally, Powers can be used to heal oneself or execute powerful attacks against opponents. Exclusive weapons found only in Together mode are also included. Examples are [[Medusa Head]]s, [[Capture Circle]]s and [[Chomp Trap]]s. | At the beginning of each match, all of the players will be able to choose amongst the weapons they have collected during the single player campaign. In addition, some well known items can also be found such as [[Food]] to replenish health. Finally, [[Powers]] can be used to heal oneself or execute powerful attacks against opponents. Exclusive weapons found only in Together mode are also included. Examples are [[Medusa Head]]s, [[Capture Circle]]s and [[Chomp Trap]]s. | ||
===== Daybreak ===== | ===== Daybreak ===== | ||
The most notable weapon which is unique to this mode is [[Daybreak]]. It consists of three parts to be found: Daybreak A, B and C. Once combined, it unleashes a mighty blast that, if positioned correctly, will knock out foes in one hit. Players will hold on to the pieces until one player collects all three, but they can drop the pieces if they are defeated. | |||
The most notable weapon which is unique to this mode is | |||
===Weapon Value=== | ===Weapon Value=== | ||
The value of one's weapon affects both game modes of multiplayer. In ''Light vs. Dark'', the higher the value of the weapon, the greater the amount of a team's life gauge will drop. So in this instance, using powerful weapons in the battlefield isn't always necessarily the best strategy. In ''Free-for-All'', the player that defeats a foe with a | The value of one's weapon affects both game modes of multiplayer. In ''Light vs. Dark'', the higher the value of the weapon, the greater the amount of a team's life gauge will drop. So in this instance, using powerful weapons in the battlefield isn't always necessarily the best strategy. In ''Free-for-All'', the player that defeats a foe with a higher weapon value will receive less points for each fighter defeated compared to someone with a lower weapon value. However, players can defeat other Fighters more easily than one with a lower weapon value. | ||
===Stamina=== | ===Stamina=== | ||
As in Solo Mode, each Fighter will also have a limited amount of stamina during battle. If a player runs for too long or uses too much energy (causing sweat to | As in Solo Mode, each Fighter will also have a limited amount of stamina during battle. If a player runs for too long or uses too much energy (causing a sweat notification next to the heath bar as well as sweat indications from the character) when dashing, they will begin to slow down and then stumble while flashing red, making them unable to move or dodge. The power [[Tirelessness]] will prevent the user from losing Stamina for a duration of time. | ||
===Rewards=== | ===Rewards=== | ||
After a battle has finished, players will be given a sum of | After a battle has finished, players will be given a sum of [[heart]]s depending on how well they did. They may be even rewarded with Weapons, Powers, or [[Idol]]s. The chances for better rewards increase if the player fights with more people and by fighting players registered on their friend list. Individuals that do very little during a match will not be rewarded much, regardless if their team won or not. | ||
==Stages== | ==Stages== | ||
Together Mode features a number of stages for players to battle in. These stages are very different to what is experienced in Solo Mode. However, the flow of fighting remains the same, with some elements from Solo Mode being borrowed onto Together Mode, specifically [[Grind Rail]]s, [[Jump Pad]]s and music tracks such as the Land Battle music for Chapter 19: ''[[The Lightning Chariot]]'' being played on the stage [[Forgotten City]]. The following is a list of all Stages found in the game: | |||
{| align="center" border="2" cellpadding="2" cellspacing="1" style="width: 800px; height: 300px;" | {| align="center" border="2" cellpadding="2" cellspacing="1" style="width: 800px; height: 300px;" | ||
| Line 44: | Line 52: | ||
|- | |- | ||
| | | | ||
<p style="text-align: center;">'''Windy Wasteland'''</p> | <p style="text-align: center;">'''[[Windy Wasteland]]'''</p> | ||
| style="text-align: center;"|This | | style="text-align: center;"|This basic example of a battle stage is normally the first to be encountered by [[Fighter]]s. It has a grassy themed appearance coupled with some temple ruins. | ||
| style="text-align: center;"|[[File: | | style="text-align: center;"|[[File:Windy Wasteland.png|200px]] | ||
|- | |- | ||
| | | | ||
<p style="text-align: center;">'''Lava Basin'''</p> | <p style="text-align: center;">'''[[Lava Basin]]'''</p> | ||
| style="text-align: center;"| | | style="text-align: center;"|The second stage normally encountered by [[Fighter]]s, Lava Basin is set around the vent of a volcano. The terrain mainly includes molten rock and chain-linked bridges. | ||
| style="text-align: center;"|[[File:arena_volcanic.png|200px]] | | style="text-align: center;"|[[File:arena_volcanic.png|200px]] | ||
|- | |- | ||
| | | | ||
<p style="text-align: center;">'''Starlight Observatory'''</p> | <p style="text-align: center;">'''[[Starlight Observatory]]'''</p> | ||
| style="text-align: center;"| | | style="text-align: center;"|The third stage in Together Mode. This battleground is always fought at nighttime, adding to the mysterious effect of glass structures found within. | ||
| style="text-align: center;"|[[File:arena_temple.png|200px]] | | style="text-align: center;"|[[File:arena_temple.png|200px]] | ||
|- | |- | ||
| | | | ||
<p style="text-align: center;">'''Ancient Fortress'''</p> | <p style="text-align: center;">'''[[Ancient Fortress]]'''</p> | ||
| style="text-align: center;"| | | style="text-align: center;"|The fourth stage in Together Mode. The fragmented castle provides both perfect aerial sniping and secret hiding spots for those in peril of death. | ||
| style="text-align: center;"|[[File:arena_castle.png|200px]] | | style="text-align: center;"|[[File:arena_castle.png|200px]] | ||
|- | |- | ||
| | | | ||
<p style="text-align: center;">'''Twilight Stratosphere'''</p> | <p style="text-align: center;">'''[[Twilight Stratosphere]]'''</p> | ||
| style="text-align: center;"| | | style="text-align: center;"|The fifth stage in Together Mode. This battleground features the ''Thunder Cloud Temple'' music. Set high up in the sky, it is very fragmented. | ||
| style="text-align: center;"| | | style="text-align: center;"|[[File:KIU Multiplayer Stage.jpg|200px]] | ||
|- | |- | ||
| | | | ||
<p style="text-align: center;">'''Desert Tomb'''</p> | <p style="text-align: center;">'''[[Desert Tomb]]'''</p> | ||
| style="text-align: center;"| | | style="text-align: center;"|The sixth stage in Together Mode. Desert Tomb's main feature is it's distinct three levels made specifically for snipers, melee fighters and the injured. | ||
| style="text-align: center;"| | | style="text-align: center;"|[[File:Desert Tomb.jpg|200px]] | ||
|- | |- | ||
| | | | ||
<p style="text-align: center;">'''Rail Temple'''</p> | <p style="text-align: center;">'''[[Rail Temple]]'''</p> | ||
| style="text-align: center;"| | | style="text-align: center;"|The seventh stage of Together Mode. As its name implies, [[Grind Rail]]s are used here, the only battleground to do so. This stage is considered as the most intriguing. | ||
| style="text-align: center;"|[[File: | | style="text-align: center;"|[[File:Rail Temple.png|200px]] | ||
|- | |- | ||
| | | | ||
<p style="text-align: center;">'''Cave of Spirits'''</p> | <p style="text-align: center;">'''[[Cave of Spirits]]'''</p> | ||
| style="text-align: center;"| | | style="text-align: center;"|The eighth stage of Together Mode. Cave of Spirits is the most complex battleground with multiple routes and pathways. To be attempted by experienced players only. | ||
| style="text-align: center;"|??? | | style="text-align: center;"|??? | ||
|- | |- | ||
| | | | ||
<p style="text-align: center;">'''Forgotten City'''</p> | <p style="text-align: center;">'''[[Forgotten City]]'''</p> | ||
| style="text-align: center;"| | | style="text-align: center;"|The ninth stage of Together Mode. Forgotten City has a large building and plenty of room outside containing a large pit and a few platforms. | ||
| style="text-align: center;"| | | style="text-align: center;"|[[File:Forgotten City.jpg|200px]] | ||
|- | |- | ||
| | | | ||
<p style="text-align: center;">'''Spiral Tower'''</p> | <p style="text-align: center;">'''[[Spiral Tower]]'''</p> | ||
| style="text-align: center;"| | | style="text-align: center;"|The tenth stage of Together Mode, and the last of the ''normal'' stages. The most prominent feature is the tall tower which has advantages and drawbacks. | ||
| style="text-align: center;"|??? | | style="text-align: center;"|??? | ||
|- | |- | ||
| | | | ||
<p style="text-align: center;">'''Large Arena'''</p> | <p style="text-align: center;">'''[[Large Arena]]'''</p> | ||
| style="text-align: center;"|A flat, wide open, circular stage | | style="text-align: center;"|The eleventh stage of Together Mode. A flat, wide open, circular stage with plenty of fighting room, but no obstacles to take cover behind. | ||
| style="text-align: center;"|??? | | style="text-align: center;"|??? | ||
|- | |- | ||
| | | | ||
<p style="text-align: center;">'''Small Arena'''</p> | <p style="text-align: center;">'''[[Small Arena]]'''</p> | ||
| style="text-align: center;"| | | style="text-align: center;"|The twelfth and final stage of Together Mode. This circular stage is a smaller version of its cousin, offering very limited fighting space and nowhere to run or hide. | ||
| style="text-align: center;"|??? | | style="text-align: center;"|??? | ||
|} | |} | ||
[[Category:Kid Icarus: Uprising]] | [[Category:Kid Icarus: Uprising]] | ||
Latest revision as of 17:50, 11 February 2019

|
You can help Icaruspedia by adding an image to it. Specifics: Images for Stages. |
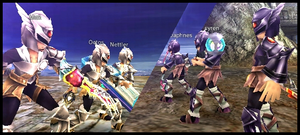
The Together Mode in Kid Icarus: Uprising is a new feature to the series that allows six players to battle each other. The entire mode plays in the same way as the ground missions of the game, with the on-rails flight mechanics never being used during any part of a match. It was first introduced at E3 2011 and allows 3 on 3 battles using the same weapons that are featured in the single player campaign. Players play as Fighters equipped with a weapon and Powers chosen before the matches begin, and a Fighter can be replaced with either Pit or Dark Pit once certain requirements are met. Despite this being a multiplayer mode, all four modes can still be played by one player simply by creating a room or choosing the "With Anyone" mode. In "With Friends" or "Nearby" mode, the empty spots will be replaced by computer players. The number of Fighters defeated are represented by swords on the top right corner of the main Together Mode screen.
The game supports local and online multiplayer, allowing six people nearby or across the globe to battle each other in both random and friend matches. Uprising uses the Nintendo Network instead of Nintendo Wi-Fi Connection, the first official game in North America to do so.
Connectivity
Nearby (Local)
When selecting "Nearby", players can only play with other people in close vicinity by creating rooms for them to join.
Far Away (Online)
When selecting "Far Away", players can battle it out with friends or strangers all across the world. When playing with strangers, players will be sent to a random room with available slots.
With Friends
This option only allows fights between friends registered on the Friend List while playing "Far Away".
With Anyone
This option only allows random strangers to join the fray while playing "Far Away".
Game Modes
There are two main modes of gameplay in Together Mode:
Light vs. Dark

The rules of this mode are both unique and simple. All six players are divided into two teams: Light Team and Dark Team. Each team consists of three Fighters with separate health bars and each armed with a weapon of choice as well as their own Powers. In addition to the individual health bars, each team also has a life gauge that is depleted each time a team member is eliminated. The main goal of the game is to keep defeating the opposing team's Fighters until their life gauge is depleted. Once that occurs, the enemy team's last defeated member will spawn as either Pit or Dark Pit, depending on the team's color. At this point, the life gauge for that team will be used as the angel's health bar, and once again must be depleted for the other team to win. However, angels are much stronger in battle and have more health than the typical Fighter, making teamwork very necessary to beat the enemy. If a player other than the angel is defeated, the angel's health bar is depleted as a life gauge, however healing powers and items can restore the gauge as a life meter.
Free-for-All

This mode has no teams and no angels, instead having different colored Fighters battle each other until the time limit is over. Who ever receives the highest overall score wins. Like team matches, players will be able to equip their weapon of choice as well as a number of Powers for use throughout the match. Some of the battlefields in Free-for-All are also considerably smaller than those of Light vs. Dark. This mode can be played with less than six people, although computerized characters will fill in the rest of the slots.
Rules
Weapons and Items
At the beginning of each match, all of the players will be able to choose amongst the weapons they have collected during the single player campaign. In addition, some well known items can also be found such as Food to replenish health. Finally, Powers can be used to heal oneself or execute powerful attacks against opponents. Exclusive weapons found only in Together mode are also included. Examples are Medusa Heads, Capture Circles and Chomp Traps.
Daybreak
The most notable weapon which is unique to this mode is Daybreak. It consists of three parts to be found: Daybreak A, B and C. Once combined, it unleashes a mighty blast that, if positioned correctly, will knock out foes in one hit. Players will hold on to the pieces until one player collects all three, but they can drop the pieces if they are defeated.
Weapon Value
The value of one's weapon affects both game modes of multiplayer. In Light vs. Dark, the higher the value of the weapon, the greater the amount of a team's life gauge will drop. So in this instance, using powerful weapons in the battlefield isn't always necessarily the best strategy. In Free-for-All, the player that defeats a foe with a higher weapon value will receive less points for each fighter defeated compared to someone with a lower weapon value. However, players can defeat other Fighters more easily than one with a lower weapon value.
Stamina
As in Solo Mode, each Fighter will also have a limited amount of stamina during battle. If a player runs for too long or uses too much energy (causing a sweat notification next to the heath bar as well as sweat indications from the character) when dashing, they will begin to slow down and then stumble while flashing red, making them unable to move or dodge. The power Tirelessness will prevent the user from losing Stamina for a duration of time.
Rewards
After a battle has finished, players will be given a sum of hearts depending on how well they did. They may be even rewarded with Weapons, Powers, or Idols. The chances for better rewards increase if the player fights with more people and by fighting players registered on their friend list. Individuals that do very little during a match will not be rewarded much, regardless if their team won or not.
Stages
Together Mode features a number of stages for players to battle in. These stages are very different to what is experienced in Solo Mode. However, the flow of fighting remains the same, with some elements from Solo Mode being borrowed onto Together Mode, specifically Grind Rails, Jump Pads and music tracks such as the Land Battle music for Chapter 19: The Lightning Chariot being played on the stage Forgotten City. The following is a list of all Stages found in the game:
| This basic example of a battle stage is normally the first to be encountered by Fighters. It has a grassy themed appearance coupled with some temple ruins. | 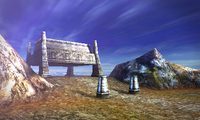
| |
| The second stage normally encountered by Fighters, Lava Basin is set around the vent of a volcano. The terrain mainly includes molten rock and chain-linked bridges. | 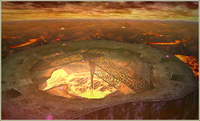
| |
| The third stage in Together Mode. This battleground is always fought at nighttime, adding to the mysterious effect of glass structures found within. | 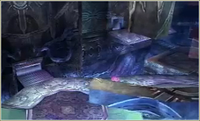
| |
| The fourth stage in Together Mode. The fragmented castle provides both perfect aerial sniping and secret hiding spots for those in peril of death. | 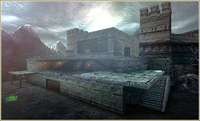
| |
| The fifth stage in Together Mode. This battleground features the Thunder Cloud Temple music. Set high up in the sky, it is very fragmented. | 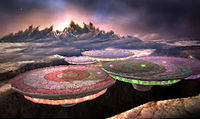
| |
| The sixth stage in Together Mode. Desert Tomb's main feature is it's distinct three levels made specifically for snipers, melee fighters and the injured. | 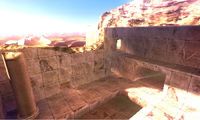
| |
| The seventh stage of Together Mode. As its name implies, Grind Rails are used here, the only battleground to do so. This stage is considered as the most intriguing. | 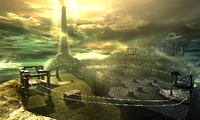
| |
| The eighth stage of Together Mode. Cave of Spirits is the most complex battleground with multiple routes and pathways. To be attempted by experienced players only. | ??? | |
| The ninth stage of Together Mode. Forgotten City has a large building and plenty of room outside containing a large pit and a few platforms. | 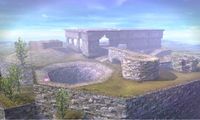
| |
| The tenth stage of Together Mode, and the last of the normal stages. The most prominent feature is the tall tower which has advantages and drawbacks. | ??? | |
| The eleventh stage of Together Mode. A flat, wide open, circular stage with plenty of fighting room, but no obstacles to take cover behind. | ??? | |
| The twelfth and final stage of Together Mode. This circular stage is a smaller version of its cousin, offering very limited fighting space and nowhere to run or hide. | ??? |